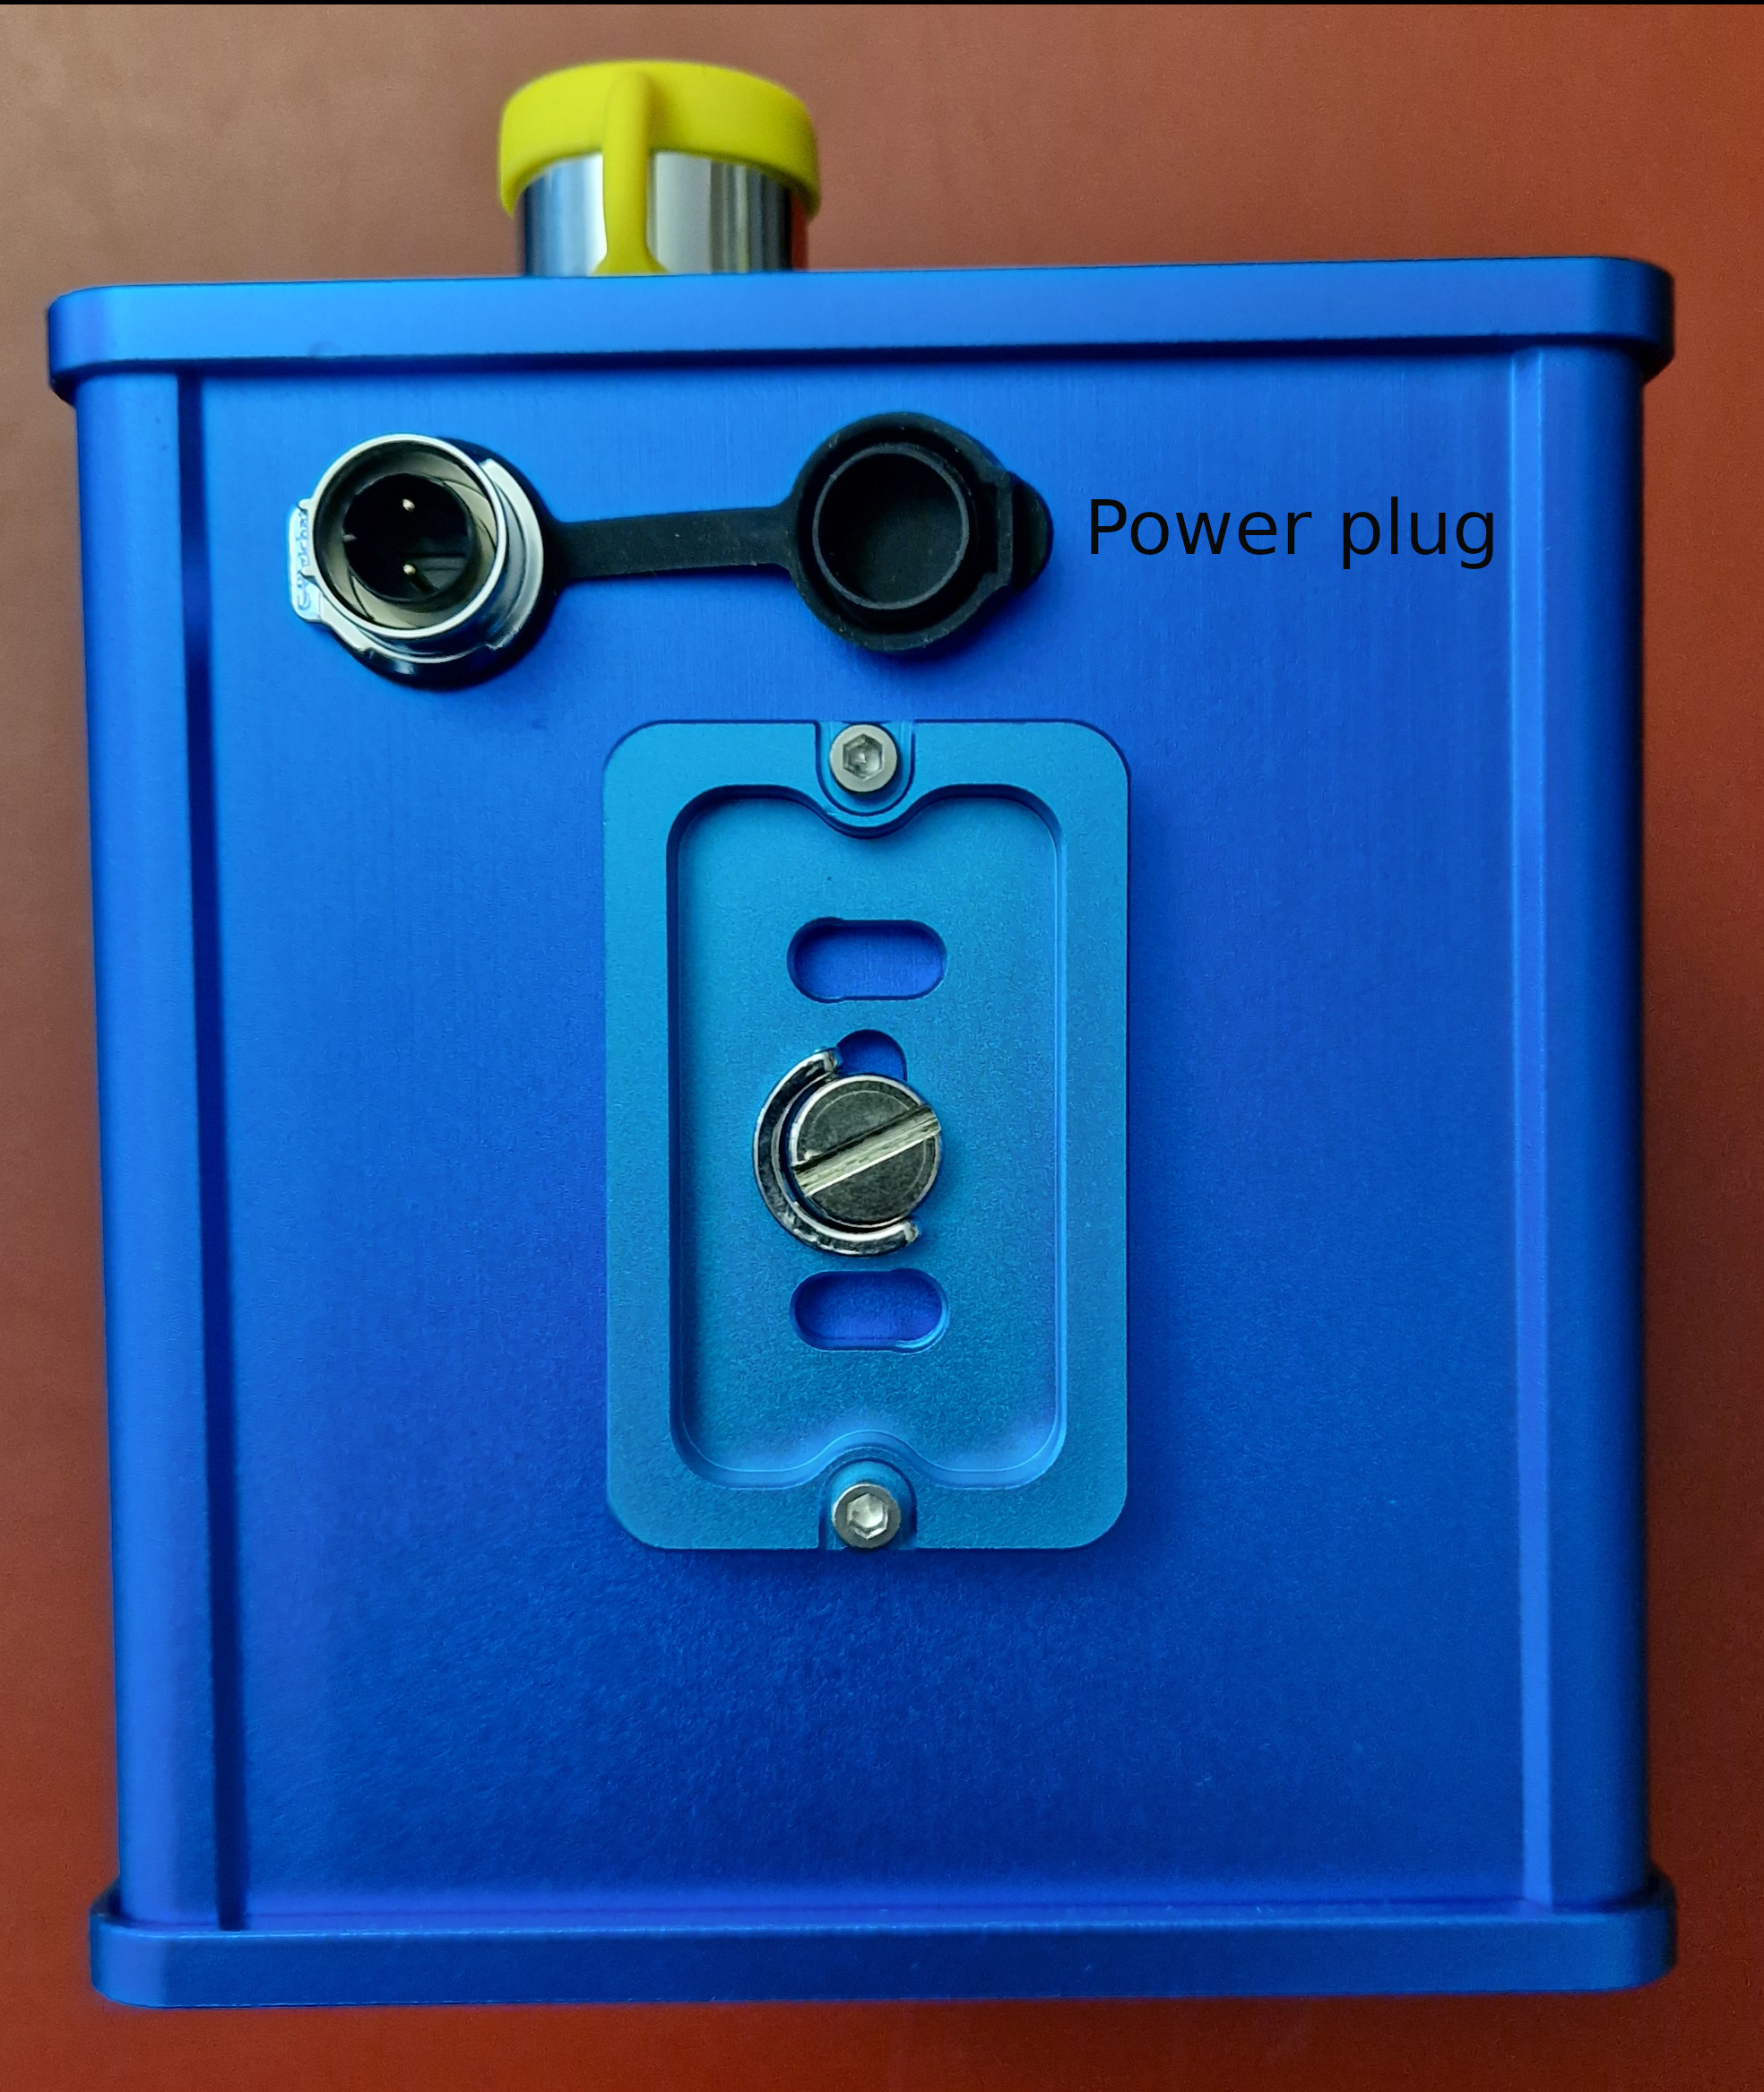
Power
The ptBox requieres 5-30V input via a LP12 M12 power plug which is provided.
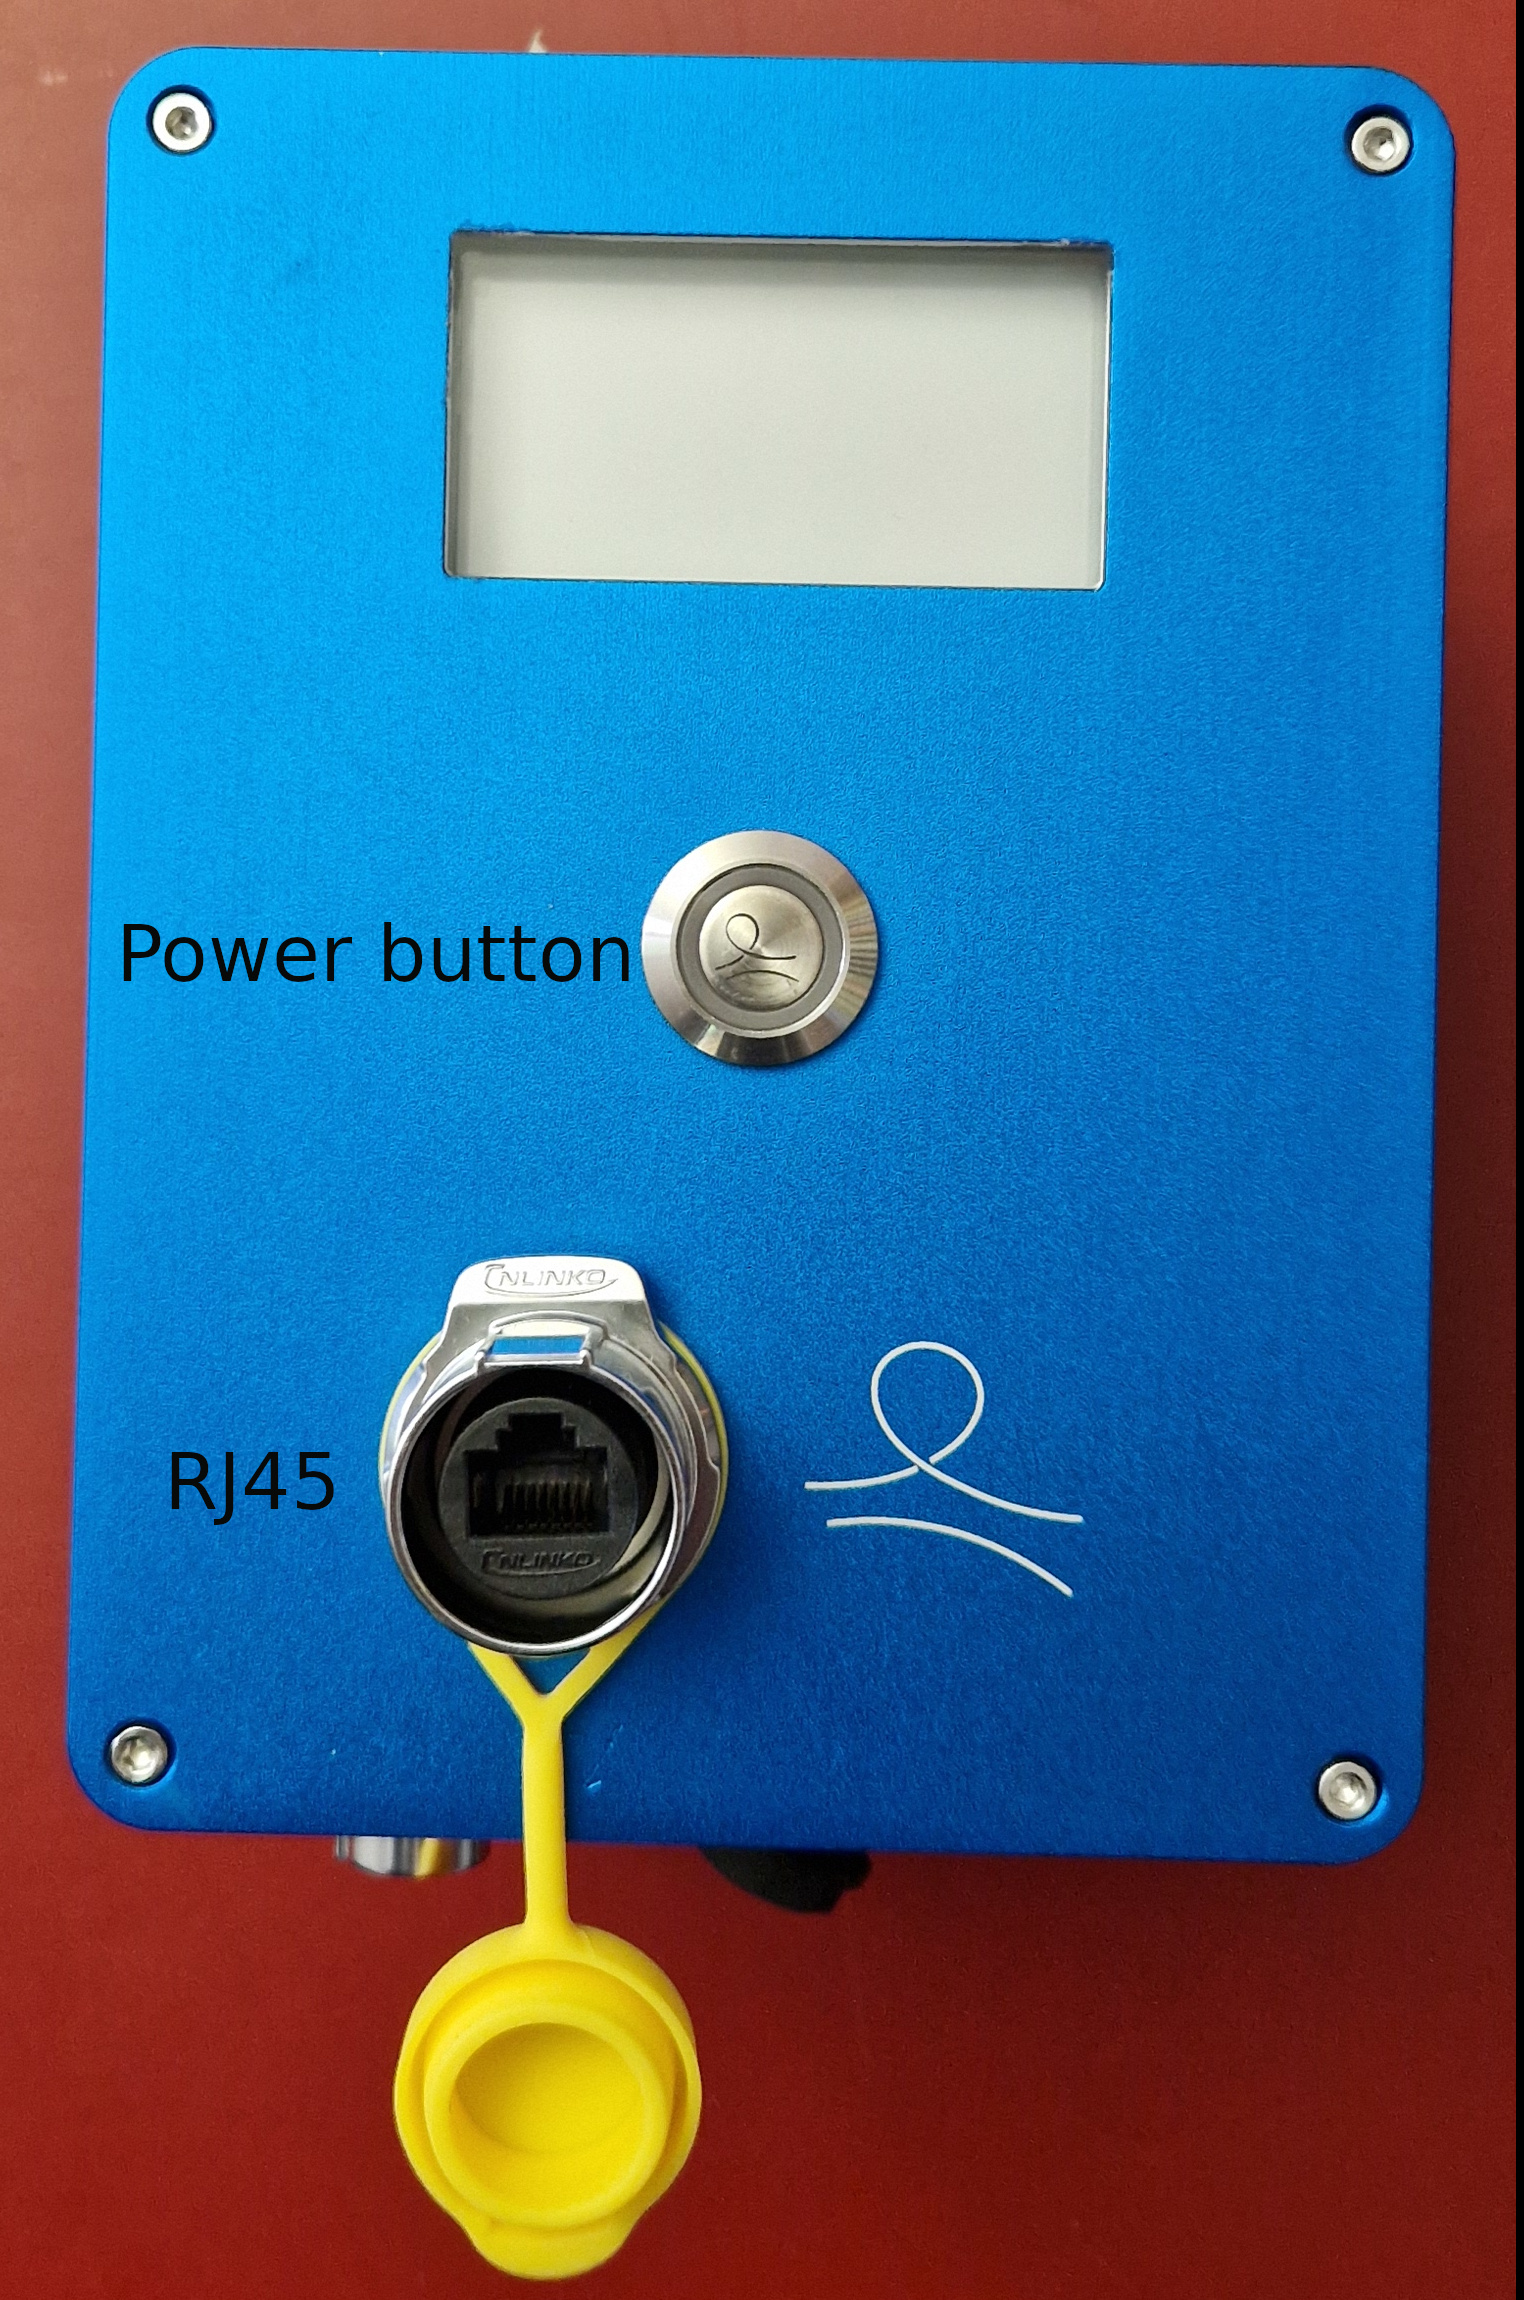
Turn On
To turn on the ptBox click one on the power button (see Specifications). If it is the first time the ptBox has been turnned on, it will start in Maintenance mode (see next section Operation Modes)
Turn Off
To turn OFF the ptBox click the power button for 10 seconds.
Operation Modes
The ptBox has different operation modes. The main mode is “Cycling”, while on this mode the ptBox turns on at predefined times, performs predefined actions and turns-off. When it is desired to access the ptBox, it is necessary to stop the cycling mode and change it to “Maintenance” in this mode the ptBox will stop the cycle and be ready for access.
Cycle mode
This is the main ptBox mode, while in this mode, it will turn on at predefined times and will execute certain commands once done, it will shutdown.
On starting it will invoke the script /home/pt/ptBox_Start.sh. However, if it is desired to change the behavior and invoke specific commands you can modify the script in /home/pt/mode/run_ptBox_cycle.sh
Maintenance Mode
Depending on the task performed during cycling mode, the ptBox might be ON only for a short period of time, making it difficult to access it.
If it is desired to work on the ptBox software and have it ON for a longer period of time, the ptBox can be put in “Maintenance” mode.
3 main things take place when in Maintenance mode:
The cycle mode will be interrupted.
TeamViewer will be activated for remote access.
A hotspot will be created with the same name as the ptBox.
A timeout of 30 minutes is setup. After this time the ptBox will automatically restart in cycling mode.
There are 2 ways to bring the ptBox into maintenance mode, via FTP when the user is not close to the ptBox and using an USB stick prepared with the maintenance mode configuration.
Maintenance mode via FTP
Every cycle the ptBox looks inside the FTP folder for a configuration_file, if it finds the file, it will updated its configuration accordingly. To go into maintenance mode the following field in the configuration file should be set to “M”:
"ptBox_mode" : "M"
Inside the FTP a folder the following subfolder structure should exist:
In order to go into Maintenance mode the file has to be moved up to the parent folder: trigger files
The content of the file ptBox-xxxxx_config.json is described in: Configuration file
For more information on how to access the ptBox see the section Access
Configuration file
The configuration should have the following parameters in JSON format:
{
    "ptBox_mode" : "C",
    "reboot_timeout" : 30,
    "cycle_period" : 30,
    "start_time" : 0600,
    "night_time" : 1700,
    "video_length" : 5
}
ptBox_mode: C for Cycling M for maintenance
reboot_timeout: time before reboot to cycle mode in minutes [15-60]
cycle_period range: cycle period in minutes [5, 10, 15, 20, 30]
start_time: Hour of the day at which recording is started, [0001-1200]
night_time: Hour of the day at which recording is stopped, [1201-2400]
video_length: video duration in seconds
Update ptBox configuration
Following the same procedure described in Maintenance mode via ftp can be used to update any parameter described in this section.
Access
The ptBox can be accessed via SSH, VNC or Teamviewer
Connect via to the RPi via SSH
Connecting to the ptBox using SSH it is possible via Ethernet cable, hotspot or a VPN.
Using Ethernet cable: 1. Connect the ethernet port to the network 2. On the linux PC change the network settings IPV4 to Link-local Only 3. On PC type:
$ ssh pt@<IP address>
Connect via VNC
To connect to the ptBox via VNC the following things are necessary:
1. VNC viewer installed in the computer which is going to be used to access the ptBox. 2. The ptBox and the viewer computer have to be connected to the same network, or the ptBox has to be connected to the PC allowing the Local-Link
Now you can connect to the ptBox via VNC:
Connect to: ptBox-xxxxx.local
Username: pt
Password: XXXXXXX
If you get the error: ‘Cannot Currently Show the Desktop’, do:
$ sudo raspi-config
Go to Resolution, change screen resolution: 1280x720
Connect via TeamViewer
The ptBox comes with teamviewer installed, the only thing needed is to give the ID and Password to access it.
It is important to notice that teamviewer is only active when the ptBox is in maintenance mode.
Camera
Focus
The focus of the camera can be adjusted by changing the parameter “–lens-position” in file ptBox/capture/Picture_Capture.sh. if lens-position = 0 f is inf, lens-position = 5 -> f = 0.2 [0, 10]. Default value is 0 If parameter is missing then the camera is set in autofocus mode.
Image quality
Image quality can be adjusted by changing the parameter “–quality” in file ptBox/capture/Picture_Capture.sh.
Default value is 100, range [0, 100]. When this parameter is missing, it seems that the value is around 70
Specifications
Dimensions
Size (LxWxH): 164 x 124 x 127 mm
Weight: 2.0kg
Operating temperature
-15°C to 50°C
Power
Internal Battery: 10Ah, 3.7V, Li-Ion
Power input 5-30V
LP12 M12 power plug
Connectors
RJ45 ethernet cable
Cameras
2 Cameras, one without IR cut for night vision
12 Megapixels
Focal length: 4.74mm (28mm in 35mm-eq.), 75 degrees (at 16:9), F/1.8
Computer
CPU: Broadcom BCM2711 quad-core Cortex-A72 (ARM v8) 64-bit SoC @ 1.5GHz
RAM: 8GB LPDDR4
Storage: 150GB
WiFi 2.4GHz and 5.0GHz IEEE 802.11b/g/n/ ac
Bluetooth 5.0
Display
296×152, 2.66inch E-Paper E-Ink Display
Modem
LTE Cat 4 modem incl. GPS/Beidou/GLONASS/GALILEO/QZSS
RF sender
RF module for sending/receiving over radio frequecies